Step 1: Download VinylFlow
Click to download the macOS app:
Current version: v0.2.0-beta6
Windows: The native Windows app is under development — Windows users can use the Docker install in the meantime.
Step 2: Install and open — macOS
- Unzip the downloaded file — you'll get
VinylFlow.app - Move
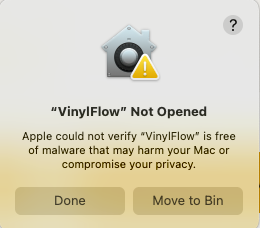
VinylFlow.appto your Applications folder (optional but recommended) - Double-click to open — macOS will say it can't be opened because it's from an unidentified developer
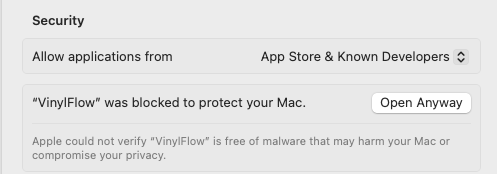
- Open System Settings (the gear icon in your Dock or Apple menu)
- Go to Privacy & Security
- Scroll down — you'll see a message: "VinylFlow was blocked from use because it is not from an identified developer"
- Click Open Anyway
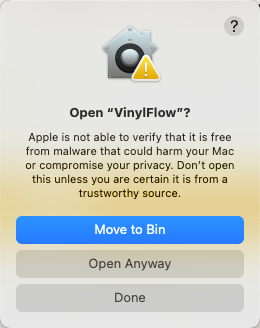
- Click Open Anyway again in the confirmation dialog
Why does this happen? Apple charges developers for a signing certificate. VinylFlow is a free, open source project and isn't commercially signed. You can verify the full source code on GitHub at any time. You only need to do this once — macOS will remember your choice.
Here's what you'll see at each step:
Step 2: Windows
The native Windows app is currently under development. Windows users can run VinylFlow today via Docker — it's quick to set up and works exactly the same way.
Step 3: First-Run Setup
When VinylFlow opens for the first time, it will show a setup screen asking for your free Discogs API token:
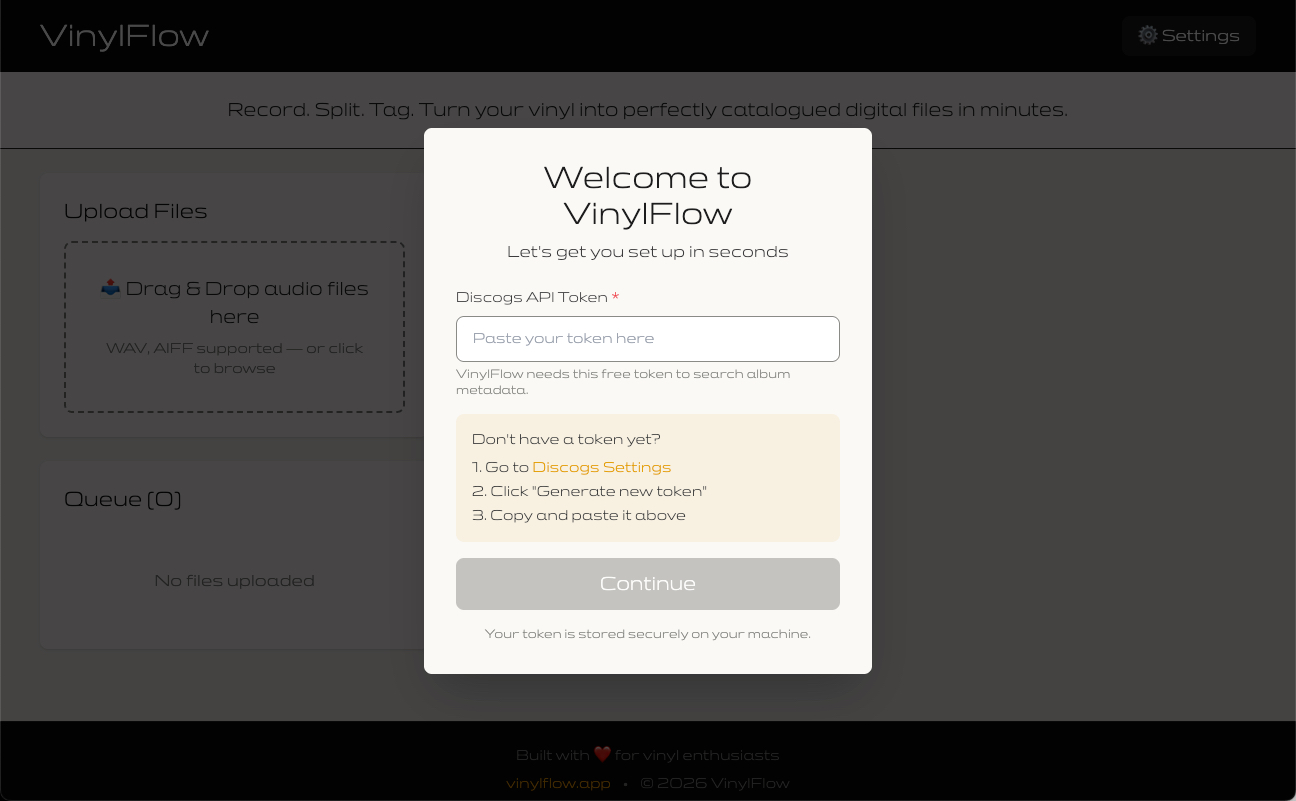
- Get your free Discogs API token — Click the link in the setup screen or visit discogs.com/settings/developers
- Generate a new token — Click "Generate new token" on the Discogs settings page
- Copy and paste — Paste your token into VinylFlow's setup screen
- Click Continue — Done! VinylFlow validates the token and you're ready to go
That's it! 🎵 No config files, no terminal, no restart needed. Your token is saved and persists across restarts.
Tip: You can update your token anytime from the Settings (⚙️) menu in VinylFlow.
Check our comprehensive troubleshooting guide for solutions to common problems.